
Find your next favorite trail
Research for your weekend trip with trail photos, videos, marked campsite locations, community trail reviews, advanced difficulty ratings, and more.

Already have an account? Log In
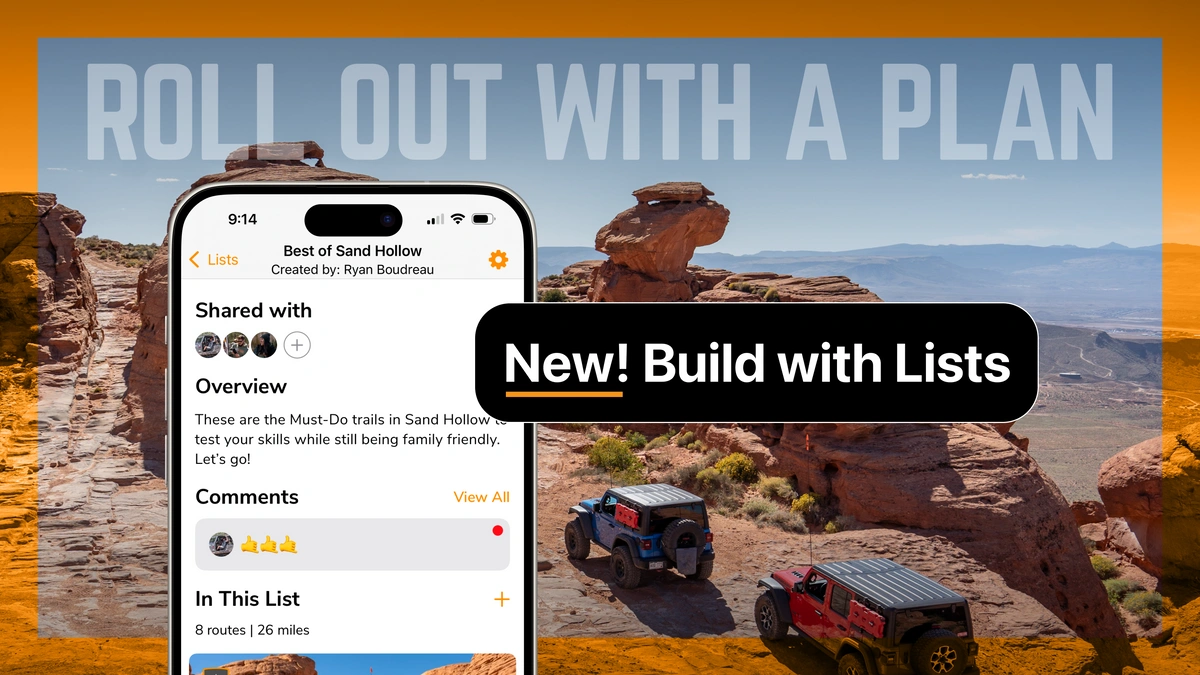
Planning your next adventure just got easier! With our new Lists feature, you can organize and track your favorite trails, bucket list goals, and completed journeys all in one place. Whether you’re gearing up for a long road trip or looking to explore over the next few months, Lists allows you to customize and share your trail plans with friends and family.
Ready to get started? Let’s dive into how this new tool can help make your outdoor adventures even more exciting!
Our Lists feature is designed to keep your trail planning organized, whether you're tackling adventures solo or with a group. It’s the perfect tool for tracking your favorite trails, planning future trips, or keeping a record of your completed journeys. You can create custom lists for anything—from short weekend getaways to month-long expeditions.
One of the best parts? You can easily share your lists with friends, family, or fellow adventurers. Whether they’re editing the list with new suggestions or just viewing your plans, sharing is simple and flexible. Keep everyone in the loop and plan your next trip together—it's never been easier to stay organized and connected on your next adventure.
Let me show you how it works!
Your lists are conveniently located in your dashboard. To access them, simply navigate to your dashboard in the upper-right corner.
Once inside, scroll down to the My Lists section and click See All to open your lists.
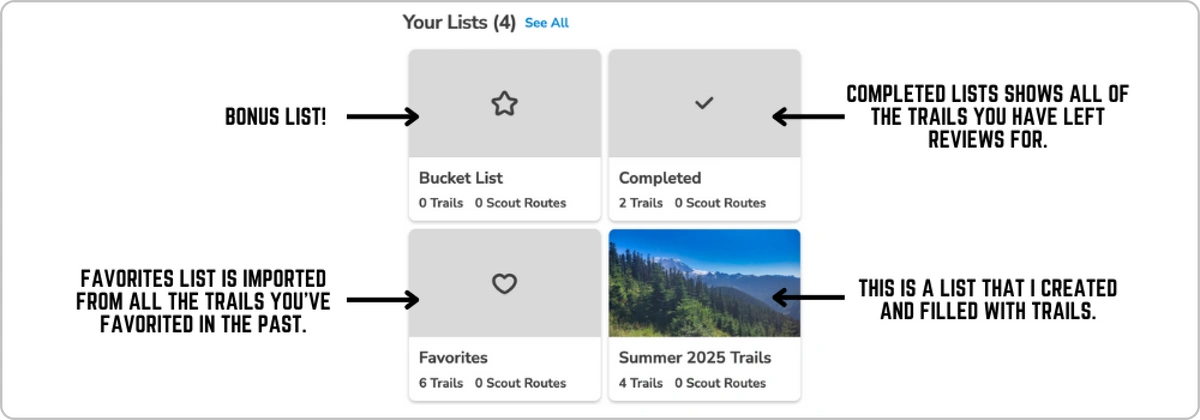
By default, you’ll start with three lists: Favorites, Completed, and Bucket List. While these default lists can’t be deleted, you can edit their names if you’d like.
Here’s a quick tip: the Completed list automatically includes all trails you’ve reviewed, marking them as completed. To keep track of the trails you’ve conquered, don’t forget to leave a review!
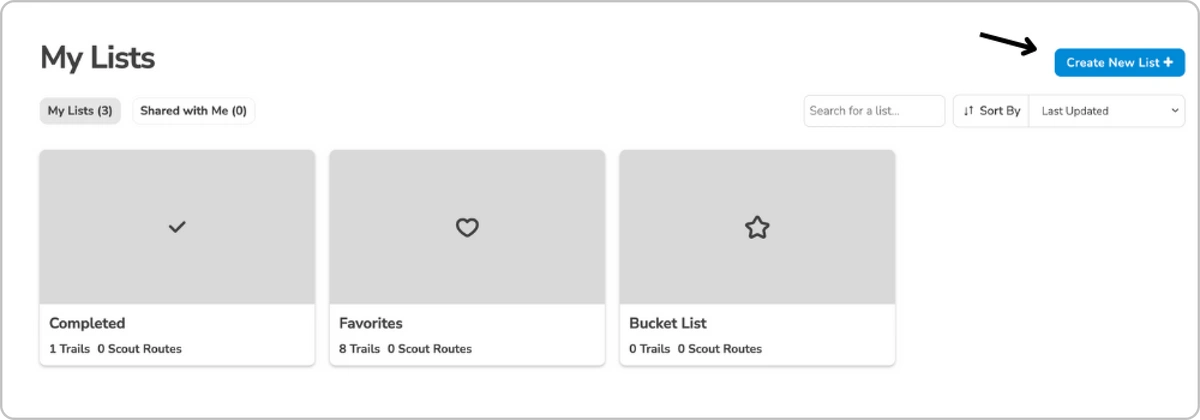
Creating a list is extremely simple. Here is a step by step tutorial on how you can make new lists.
Click on Create New List
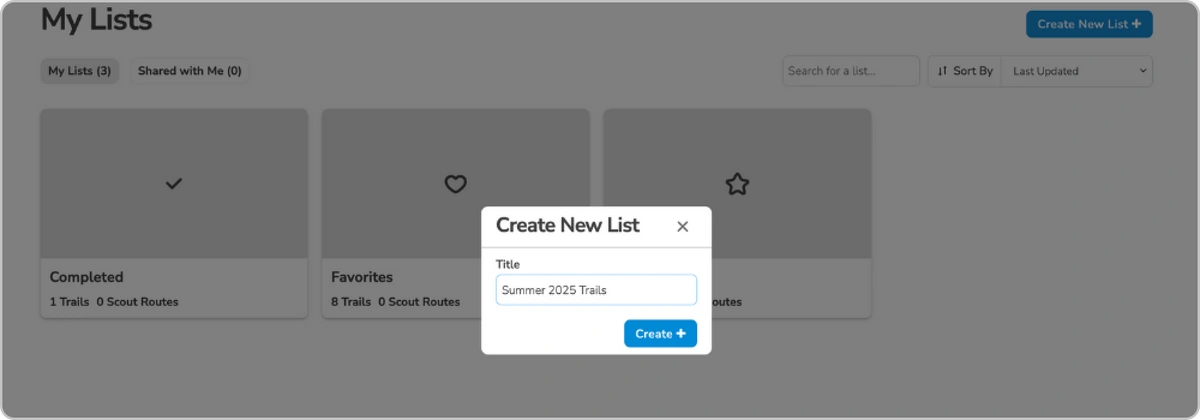
Name Your List and click Create
You’ll be guided through a brief tutorial on how to use the lists. If it’s your first time, we highly recommend reading through it to get familiar with the feature. Please note that this pop-up will appear each time you create a new list or access one of your existing lists.
Now that you have created your new list you can begin adding trails, sharing it with friends, and leaving notes in the comments section. We will go through how to do each of these actions below.
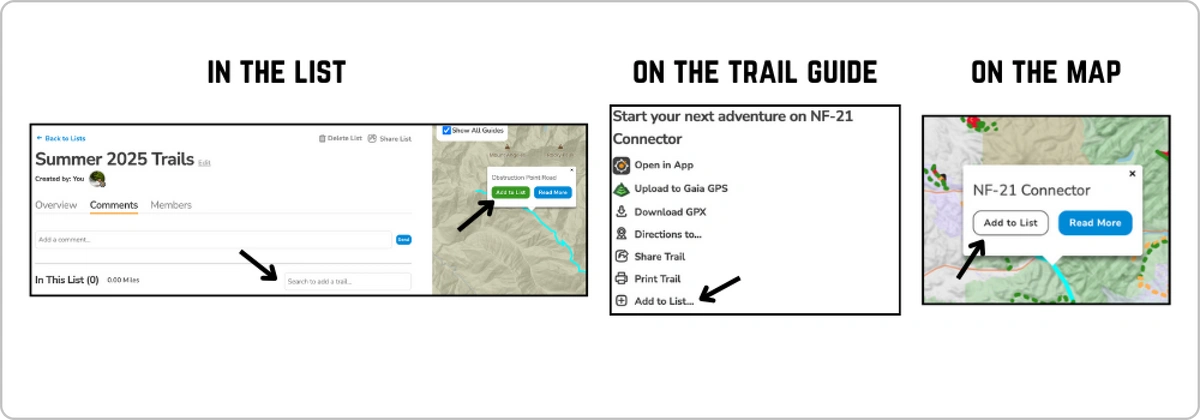
There are several ways to add trails to your lists, making it easy to keep everything organized.
Adding a Trail Directly from the List
The most convenient way is by adding trails directly from the list. You can either use the search bar to look up a specific trail, or navigate the map to find the trail you want and add it from there. Once you have added your trail, it will show up on the list.
Adding a Trail Through the Guides
You can also add a trail via the trail guides. In the trail guide, on the left-hand menu, you’ll find an option called "Add to List…" Once you click on it, you will see a pop-up with all your available lists. Simply select the one you’d like, and the trail will be added automatically.
If you change your mind or add it to the wrong list, no problem—just uncheck the box, and the trail will be removed.
Adding a Trail Through the Maps
When you click on a trail on the Trail Map, a pop-up will appear. This lets you read more about the trail or add it to your list. Once you select "Add to List…", you’ll see a menu where you can choose the list you want. If you later decide to remove it, uncheck the box, and it’s gone!
Now that you’ve created your list, it’s time to get your friends and family involved in planning your next adventure!
We designed this feature to make organizing your trips easier and more efficient. Whether your list is for goals over the next few months or for an upcoming week-long trip, we’ve got you covered.
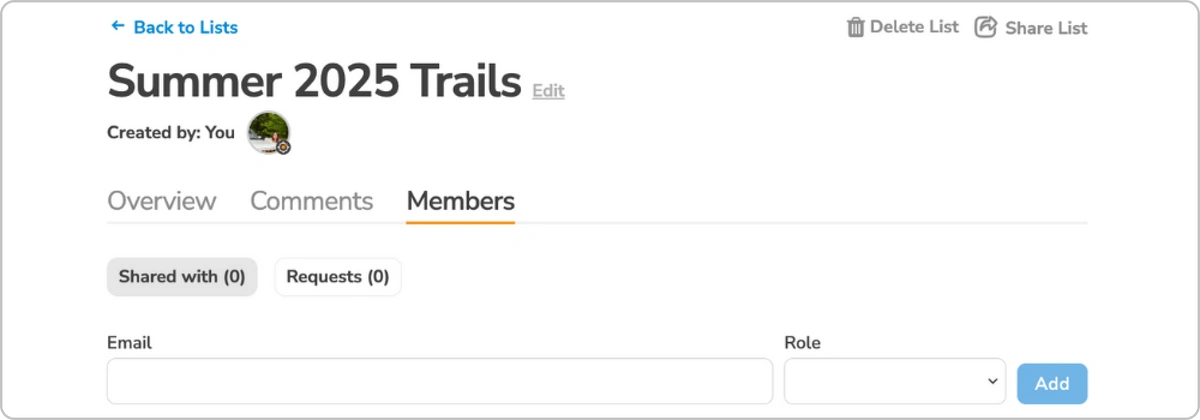
To invite someone to your list, follow these steps:
Open your list and navigate to the Members section.
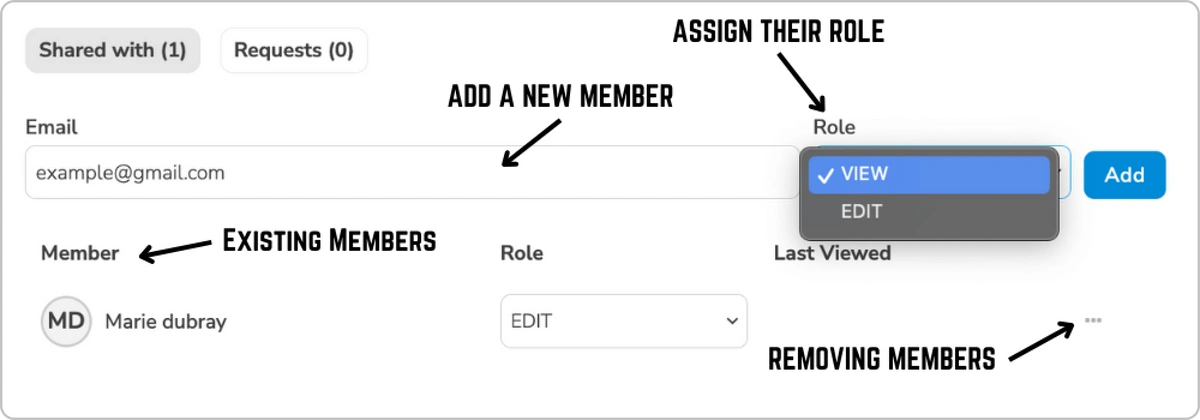
Enter the email address of the person you’d like to share the list with.
Assign them a role: Edit if you’d like them to make changes or View if you’d prefer they only see the list. Don’t worry you can always change this later.
Once they are added, they will show up in the Members List below. You can always remove a member by clicking the 3 Dots and selecting Remove.
You can share your lists with as many people as you like. Keep in mind that if they’re not paid members, they won’t have access to our detailed trail guides. However, they can still view the lists you’ve shared with them and see the trails included.
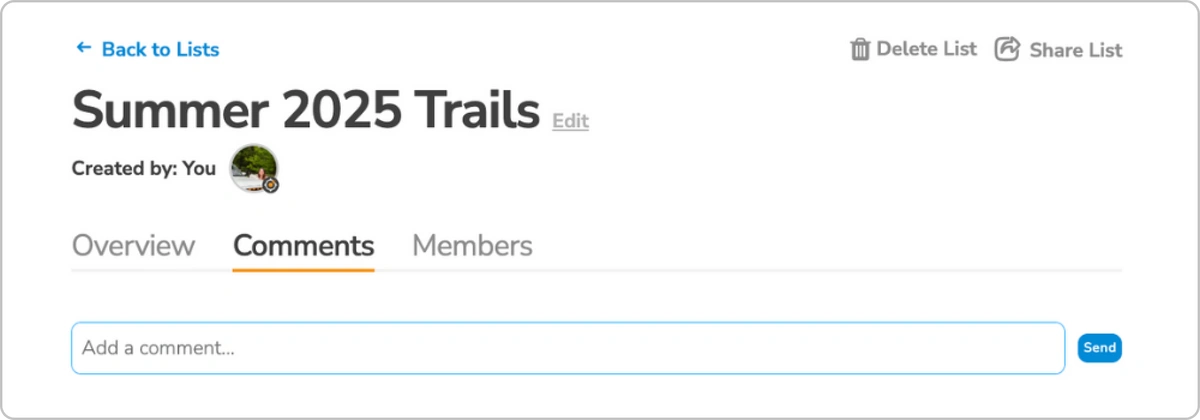
With Lists you can also have the ability to have a discussion with other members, which I like to think of as your own group chat! This space allows you to easily communicate and share ideas, making planning your trips even more interactive and fun.
You can use this feature to share a variety of information, such as places to stop along your journey—whether it’s must-see attractions, scenic viewpoints, or spots to refuel and stock up on necessities. It’s also the perfect place for group members to share their thoughts on which trails they’re excited to try or those they think might not be worth the effort.
The best part? You have complete freedom in the comments. Whether you’re brainstorming or refining details, everyone can contribute. And don’t worry if you make a mistake or change your mind—you can always edit or delete your comment, keeping the conversation fluid and updated. This space is all about collaboration, making it easier to plan together and ensure everyone’s on the same page!
---
With the new Lists feature, organizing your trails has never been easier. Whether you’re tracking your favorites, planning your next big adventure, or keeping up with completed journeys, Lists puts everything at your fingertips. Don’t forget to share your lists on social media and tag us—we’d love to see where your adventures are taking you! Happy trail planning!